Step-by-step portrait photoshoot guide: capture Iceland
Step-by-step portrait photoshoot guide: capture Iceland ! Photographer organizing gear for Iceland trip You fly home from Iceland, scroll through your camera roll, and feel that quiet disappointment.

You fly home from Iceland, scroll through your camera roll, and feel that quiet disappointment. The landscapes were breathtaking, but the photos of you and your partner look like rushed tourist snapshots. The light was incredible, the scenery was epic, and somehow none of it translated into the portraits you imagined. That gap between what you experienced and what you captured is exactly what this guide closes. Whether you’re a couple chasing waterfalls or a solo adventurer scaling lava fields, you’ll walk away knowing how to plan, shoot, and edit portraits that actually feel like Iceland.
Table of Contents
- What you’ll need for a portrait photoshoot in Iceland
- Step 1: Plan your dream photoshoot itinerary
- Step 2: Scout and select picture-perfect locations
- Step 3: Directing and posing for authentic, adventurous portraits
- Step 4: Shooting and adapting on location
- Step 5: Editing for mood and meaningful memories
- What to do if things don’t go as planned
- Bring your Iceland story to life with a professional touch
- Frequently asked questions
Key Takeaways
| Point | Details |
|---|---|
| Preparation matters | The right gear and planning are essential for successful portraits in Iceland’s unpredictable conditions. |
| Authentic storytelling | Emotional connections and candid interactions create memorable images far beyond standard snapshots. |
| Light and weather | Take advantage of golden hour and embrace Iceland’s weather for truly magical and dramatic portraits. |
| Flexibility is key | Having a backup plan and adapting on the spot are crucial for adventure photography success. |
| Professional support | Hiring a local pro ensures safety, local insight, and pictures worthy of your Iceland adventure. |
What you’ll need for a portrait photoshoot in Iceland
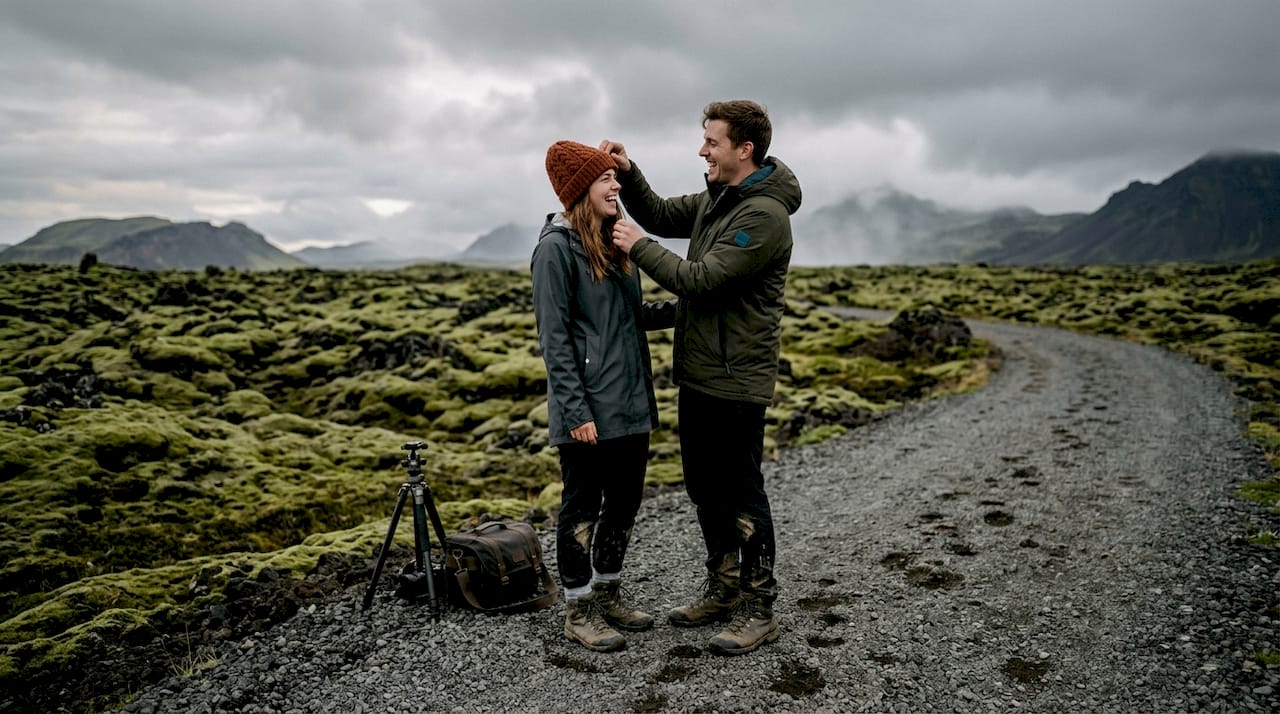
Before you step into Iceland’s awe-inspiring landscapes, here’s how to prepare. Getting your gear and safety plan right before you land saves you from scrambling on location when the wind picks up and the light shifts in minutes.
Essential gear for Iceland includes a weather-sealed camera body, a wide-angle lens, a sturdy tripod, and extra batteries. Cold temperatures drain batteries faster than you’d expect, so pack at least two spares per camera.
Here’s a quick gear checklist to get you started:
- Camera body: Weather-sealed DSLR or mirrorless (Sony, Nikon, Canon all work well)
- Lenses: Wide-angle (16-35mm) for landscapes, 50mm or 85mm for portraits
- Tripod: Lightweight but wind-resistant
- Batteries: Minimum two extras per body
- Memory cards: Bring more than you think you need
- Clothing: Waterproof jacket, thermal base layers, waterproof gloves, hand warmers
- Apps: PhotoPills or Sun Surveyor for golden hour timing, Maps.me for offline navigation
- Safety gear: First aid kit, whistle, fully charged phone with local emergency numbers saved
For Iceland photoshoot planning tips, think about whether to rent gear locally or bring your own. Renting in Reykjavik works well for bulky tripods or specialty lenses, but your personal camera body is worth bringing since you know its quirks.
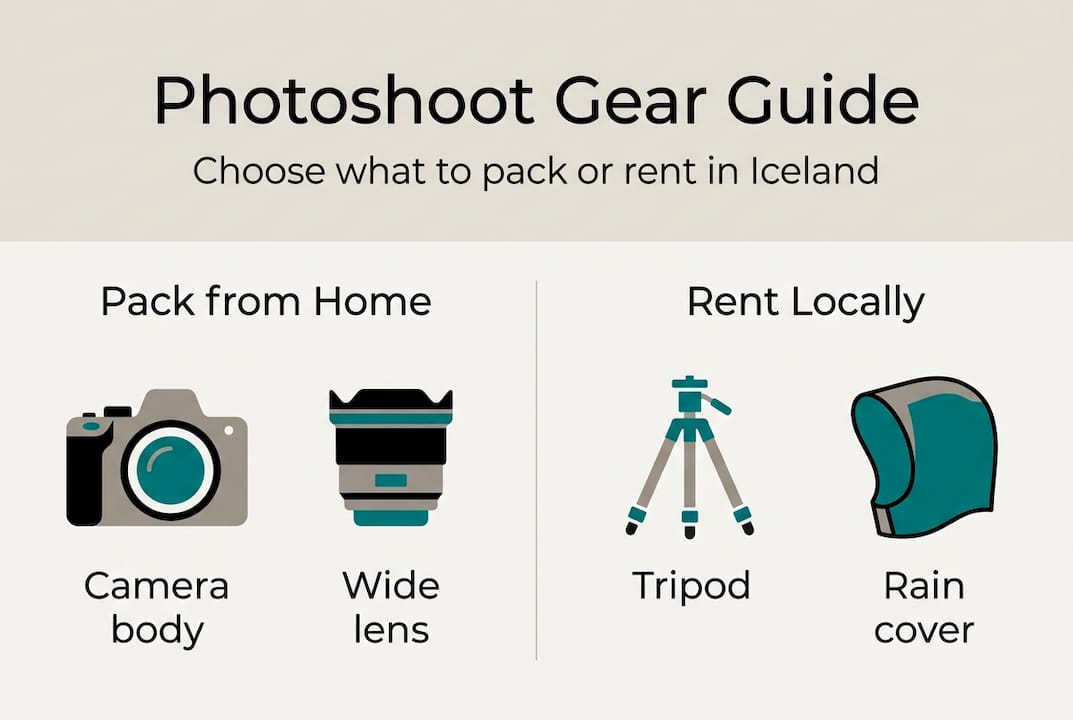
| Gear item | Bring from home | Rent locally |
|---|---|---|
| Camera body | Yes | Not recommended |
| Wide-angle lens | Yes | Available in Reykjavik |
| Tripod | Optional | Easy to rent |
| Specialty lenses | Yes | Limited availability |
| Rain cover | Yes | Hard to find |
For couple portrait ideas and adventure shoots, prepare for unpredictable weather, sneaker waves, and rugged terrain by packing safety essentials alongside your camera bag.
Pro Tip: Cold air drains batteries up to 50% faster. Keep spares in an inner jacket pocket close to your body to maintain their charge.
Step 1: Plan your dream photoshoot itinerary
With your gear and essentials ready, the next step is customizing your trip for epic portraits. A strong itinerary balances iconic locations with quieter, more personal spots that reflect your story.
Here’s how to build your itinerary step by step:
- Research regions: Shortlist areas like the South Coast (black beaches, waterfalls), the Snæfellsnes Peninsula (glaciers, dramatic cliffs), and the Highlands (raw volcanic terrain).
- Create a mood board: Gather reference images that match your vision, whether that’s moody and cinematic or bright and joyful.
- Time your sessions: Use Sun Surveyor for golden hour timing and balance famous spots like Skógafoss with hidden gems that fewer tourists visit.
- Check crowd patterns: Early mornings at popular waterfalls give you near-empty frames. Midday at Jökulsárlón glacier lagoon is usually packed.
- Build in buffer time: Iceland’s roads and weather can slow you down. Add 30 minutes between locations.
For deeper help choosing photo locations that match your style, think about what story you want to tell. A glacier hike portrait feels completely different from a black sand beach embrace.
| Location type | Pros | Cons |
|---|---|---|
| Iconic spots (Skógafoss, Jökulsárlón) | Stunning, well-documented, easy to find | Crowded, overused backgrounds |
| Hidden gems (remote valleys, secret beaches) | Unique, personal, crowd-free | Harder to access, less info available |
| Mixed itinerary | Best of both worlds | Requires more planning time |
For planning your photo tour around light, study the outdoor portrait guide principles for working with natural light at different times of day.
Pro Tip: Overcast days are actually ideal for portraits. Clouds act as a giant softbox, eliminating harsh shadows and creating flattering, even light across your subjects’ faces.
Step 2: Scout and select picture-perfect locations
Now that your itinerary is mapped, let’s lock in the best scenes for your shoot. Scouting is not just about finding pretty spots. It’s about understanding how light, terrain, and safety interact at each location.
Use these tools to scout effectively:
- Sun Surveyor or PhotoPills: Visualize exactly where the sun rises and sets at your chosen location on your specific shoot date
- Google Maps Street View: Preview road access and parking before you arrive
- Instagram geotags: Search location tags to see how other photographers have framed the same spot, then find your own angle
- Local Facebook groups: Iceland photography communities share real-time road and weather updates
Scouting at golden hour and using apps is crucial for magical lighting that transforms ordinary scenes into something cinematic. Iceland’s soft winter light and summer’s extended golden hour create completely different moods, both worth planning around.
For your location scouting guide, always check beach conditions before shooting near the ocean. Sneaker waves at Reynisfjara Black Sand Beach have caught many visitors off guard.
Safety note: Weather and terrain in Iceland can shift within minutes. Always check road conditions on road.is and tide schedules before heading to coastal locations. Never turn your back on the ocean.
For a full breakdown of the client photography journey from scouting to final delivery, understanding location safety is step one. For couple posing advice that works with Iceland’s terrain, think about how the landscape frames your subjects naturally.
Step 3: Directing and posing for authentic, adventurous portraits
You’ve found your backdrop. Now focus on capturing real emotion and story within it. The biggest mistake people make is freezing up in front of the camera. Movement and genuine interaction fix that every time.
Here’s a progression that works for couples and solo travelers alike:
- Start with foundation poses: Simple standing or sitting positions build confidence and help everyone relax before the camera.
- Add gentle movement: Walk together, hold hands while looking at the view, or lean into each other naturally.
- Progress to action: Start basic for comfort, then progress to dynamic action like hiking side by side or a piggyback on volcanic fields.
- Use the terrain: Stand on a glacier ridge for scale, twirl on a lava field, or sit at the edge of a waterfall pool.
- Encourage real interaction: Whisper something funny, share a snack, or point out something in the distance. Genuine reactions photograph beautifully.
For adventure portrait sessions that feel alive, the goal is always to capture what’s real between people, not a posed performance. For partner photography tips that translate to Iceland’s scale, think about using the landscape to tell your story, not just as a backdrop.
For solo travelers, check out the benefits of outdoor portraits and how self-directed sessions can still feel personal and powerful.
Pro Tip: If you’re shooting solo, use your camera’s interval timer set to shoot every 3 seconds. Walk naturally, don’t pose. You’ll capture 20 frames and at least a few will feel completely real.
Step 4: Shooting and adapting on location
With everyone in position, here’s your action plan for confident, creative shooting, whatever Iceland throws your way.
Key camera settings to start with:
- Format: Always shoot in RAW. Shooting in RAW captures maximum detail and gives you full flexibility when editing in all of Iceland’s varied light conditions.
- Aperture: f/2.8 to f/4 for dreamy, blurred backgrounds on portraits; f/8 to f/11 for sharp landscape context shots
- ISO: Keep it as low as possible in daylight; don’t fear ISO 1600 to 3200 in low light
- Shutter speed: At least 1/250s to freeze movement in wind
In summer, Iceland’s golden hour can last up to 4 hours, giving you an extraordinary window of warm, directional light that portrait photographers dream about.
“Embrace Iceland’s imperfect conditions for truly unique portraits. Rain on a lens, mist rolling in, snow catching in someone’s hair. These are not problems. They are the story.”
For the full photoshoot workflow from arrival to final shot, adapting to conditions is a skill. For shooting outdoors advice that applies directly to Iceland, always start with a few test frames to dial in your exposure before your subjects are in position.
Step 5: Editing for mood and meaningful memories
With your shots captured, the finishing touches make all the difference for storytelling and legacy. Editing is where Iceland’s raw drama becomes a polished visual story.
Here’s a simple editing workflow:
- Start with exposure and contrast: Lift shadows slightly to reveal detail in dark volcanic rock; pull highlights to recover sky texture
- Color balance: Iceland’s scenes often benefit from cooler tones in shadows and warmer midtones to reflect golden hour glow
- Batch edit: Apply your base settings across similar shots for a consistent, cohesive look throughout your set
- Preserve authenticity: Avoid over-smoothing skin or removing natural elements like wind-blown hair or rain drops
- Back up immediately: Use two separate drives or a cloud service before you leave Iceland
Editing can reinforce the storytelling through moodiness and color choices that match Iceland’s dramatic scenes. For a deeper look at how to edit for mood, think about whether your story calls for cool, cinematic tones or warm, intimate ones.
What to do if things don’t go as planned
Even the best-laid plans sometimes go awry. Here’s how to keep the adventure going and save your story when Iceland surprises you.
- Weather cancels your session: Head to a waterfall cave like Gljúfrabúi or shoot inside a geothermal greenhouse for a completely different but equally stunning backdrop
- Foggy lens: Bring your camera inside your jacket for 10 minutes to equalize temperature before shooting
- Battery failure: Rotate between two warm batteries kept in your inner pocket
- Unstable ground or waves: Flexible planning and proper gear like rain covers and hand warmers help you adapt without losing the session
- Self-shoot isn’t working: This is the moment to consider booking a local expert who knows the terrain, the light, and the hidden spots that don’t show up on any map
Pro Tip: Always scout your primary location the day before your shoot. While you’re there, identify a plan B and a plan C within 15 minutes’ drive. Iceland’s weather changes fast, and having options means you never lose the session entirely.
Bring your Iceland story to life with a professional touch
After all your preparation, sometimes the best memories are made with the help of a professional who knows Iceland inside out. A local photographer brings more than a camera. They bring knowledge of where the light hits perfectly at 10pm in June, which beaches are safe to shoot on, and how to make you feel completely at ease in front of the lens.

Meet your Iceland photographer and see how a tailored session transforms your adventure into a visual story you’ll return to for years. Browse the Iceland photography portfolio for real examples of couples and travelers captured against Iceland’s most dramatic backdrops. When you’re ready to make it happen, book your Iceland photoshoot and get a package designed around your specific journey, whether that’s a single golden hour session or a multi-day adventure across the island.
Frequently asked questions
What makes Iceland unique for portrait photoshoots?
Iceland offers dramatic, ever-changing landscapes combined with golden hours lasting up to 4 hours in summer, giving photographers extraordinary light that most destinations simply cannot match.
Can you get great photos even in bad weather?
Absolutely. Embracing imperfect weather like rain, mist, or snow often produces the most atmospheric and emotionally powerful portraits, because the conditions become part of the story.
Is it better to self-shoot or hire a professional photographer in Iceland?
Self-shooting is very doable with the right preparation, but pros know safety, permits, and how to frame advanced shots that require local knowledge and experience to pull off.
What’s the best time of year for Iceland adventure portraits?
Summer offers golden hour lasting 3 to 4 hours and lush green landscapes, while winter brings soft, moody light, snow-covered scenes, and the chance to shoot under the northern lights.