Iceland photography trip checklist for unforgettable shots
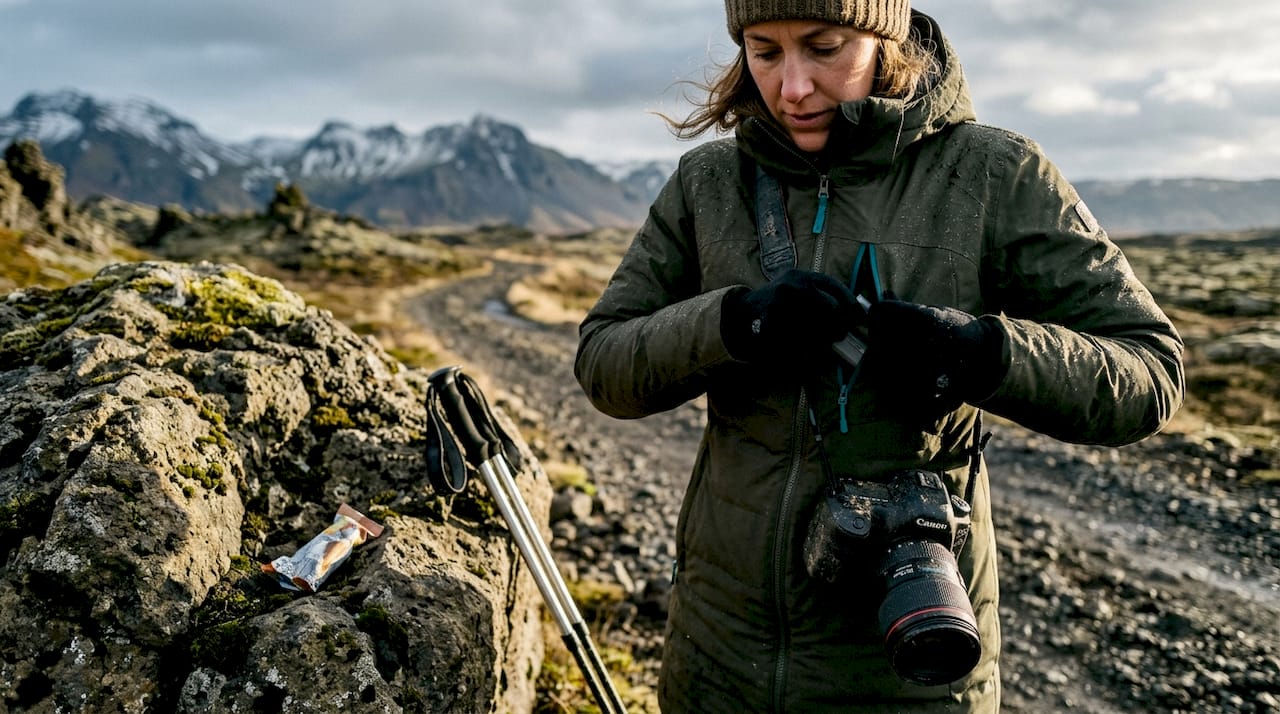
Iceland photography trip checklist for unforgettable shots ! Photographer preparing camera gear in Iceland Iceland doesn't forgive the unprepared.

Iceland doesn’t forgive the unprepared. One minute you’re shooting a glassy glacial lagoon under soft pink light, and the next a sideways sleet storm is soaking your lens cloth. Even experienced photographers get humbled here. The landscapes are extraordinary, but capturing them well means thinking through every layer of your kit before you ever board the plane. This checklist-driven guide covers everything from thermal base layers to camera settings benchmarks, so whether you’re chasing auroras in February or the midnight sun in July, you walk away with images that actually match what you saw.
Table of Contents
- Layered clothing and personal gear essentials
- Camera and technical gear: What you won’t want to forget
- Perfecting your shot: Location, timing, and camera settings
- Staying safe and shooting smart: Fieldwork strategies
- What most guides miss about Iceland photography: Why patience and minimalism win
- Ready for Iceland? Book a local expert photographer
- Frequently asked questions
Key Takeaways
| Point | Details |
|---|---|
| Dress in layers | Cold, windy, and wet conditions demand thermal base layers and waterproof outerwear. |
| Pack backup power | Bring extra batteries and keep them warm because the cold drains them fast. |
| Plan for light | Peak aurora viewing is late August to April; summer has extended golden hours for unique shots. |
| Slow down at sites | The best images come from patience and spending time in each location. |
| Prioritize safety | Always check road weather, carry essentials, and back up your data before every adventure. |
Layered clothing and personal gear essentials
Before you think about focal lengths, think about staying warm enough to hold a camera steady. Iceland’s weather is genuinely unpredictable, and your comfort directly controls your ability to shoot. A photographer who is shivering and soaked will rush every frame.
“Iceland’s weather can change in minutes — prepare for all four seasons in one day.”
As your photoshoot preparation guide will confirm, clothing is as critical as camera gear. Layering with thermal base layers, waterproof shells, and insulated boots is vital for cold, windy, and wet conditions. The logic is simple: three thinner layers trap more body heat than one thick coat, and you can peel off a mid-layer when the sun breaks through.
Here’s a practical clothing checklist to build from:
- Thermal base layer (top and bottom): merino wool or synthetic, worn directly against skin
- Mid-layer fleece or down jacket: insulation that breathes
- Waterproof, windproof outer shell: essential for coastal and highland shooting
- Insulated, waterproof boots: ankle support matters on lava fields and glacier edges
- Wool or thermal socks: two pairs minimum per shoot day
- Photography-friendly gloves: thin liner gloves under waterproof mitts, so you can handle dials without freezing
- Wool or fleece hat: covers your ears for night shoots
- Hand warmers: tuck them into gloves and pockets during long exposures
- UV or polarizing sunglasses: snow glare is brutal in spring
One thing most people overlook: cold kills camera batteries fast. Keep your spare batteries in an inner chest pocket, pressed against your body. You’ll get significantly more shots per charge that way. This is especially important for night aurora sessions, where you might be stationary for two or three hours.
Pro Tip: Choose gloves with touch-screen-compatible fingertips. You can control your camera’s touchscreen and phone without pulling your gloves off in freezing wind.
For a more detailed breakdown of what to bring to each type of shoot, the photo shoot checklist essentials covers the specifics by season and location type.
Camera and technical gear: What you won’t want to forget
With clothing sorted, ensure your photo gear matches the adventure’s demands. Iceland is hard on equipment. Salt air, rain, dust from volcanic roads, and condensation when moving from cold outdoors to a warm car can all damage gear if you’re not prepared.
Here’s a numbered list of the essential camera items to pack:
- Camera body (weather-sealed preferred): mirrorless or DSLR, ideally with a backup body
- Wide-angle lens (14-24mm): for landscapes, auroras, and black sand beaches
- Mid-range zoom (24-70mm): versatile for waterfalls and environmental portraits
- Telephoto lens (70-200mm): glaciers, birds, and compressed mountain layers
- Sturdy tripod: non-negotiable for long exposures and aurora work
- ND filters (6-stop and 10-stop): for silky waterfall shots in daylight
- Polarizing filter: cuts glare on water and saturates skies
- At least three camera batteries: cold quickly drains battery life and Iceland can be remote
- Multiple SD cards: bring more than you think you need
- Headlamp with red-light mode: keeps your night vision intact during aurora shoots
Backup strategies matter more in Iceland than almost anywhere else:
- Back up images to a laptop or portable hard drive every evening at your accommodation
- Use cloud sync over Wi-Fi when available, but don’t rely on it in rural areas
- Keep a lens cloth and a small microfiber towel in your jacket pocket, not your bag
- Pack a rain cover for your camera body and a separate one for your lens
- Carry a small silica gel pack inside your camera bag to manage condensation
For deeper context on how to apply these tools effectively, the photography best practices guide is worth reading before your trip. And if you want a full framework for organizing your shoot days, planning a photo tour covers the logistics in detail.
Pro Tip: Always shoot in RAW format. Iceland’s light is extreme and constantly shifting. RAW files give you the editing latitude to recover blown highlights from a bright glacier or pull detail from a dark aurora sky.
Perfecting your shot: Location, timing, and camera settings
Now that your gear is ready, learn how to plan where, when, and how you’ll make your most impactful images. Iceland rewards those who understand its rhythms.
Winter aurora peak is late August to mid-April; summer offers the midnight sun with extended golden hour that can last up to four hours, giving you a long window of warm, low-angle light. These are fundamentally different trips, and your shot list should reflect which season you’re in.
Key planning considerations:
- Weather and road access: Highland roads (F-roads) are closed until late May or June. Check road.is daily.
- Tides at black sand beaches: Reynisfjara and Diamond Beach change dramatically with tide. Plan around low tide for foreground interest.
- Aurora forecasts: Use the Icelandic Met Office app. A KP index of 3 or above is worth heading out for.
- Scout before you shoot: Visit locations in daylight first so you know your composition before the light gets interesting.
For more on finding the right spots, the location scouting tips guide and the choosing Iceland locations resource both offer practical frameworks.
Here are camera settings benchmarks for the most common Iceland subjects:
| Subject | Aperture | ISO | Shutter speed | Filter |
|---|---|---|---|---|
| Landscape (daylight) | f/8 to f/11 | 100 to 400 | 1/125s to 1/500s | Polarizer |
| Waterfall (silky) | f/8 to f/11 | 100 to 200 | 1s to 5s | 6 or 10-stop ND |
| Aurora | f/2.8 | 1600 to 6400 | 5s to 15s | None |
| Glacier/ice | f/8 | 200 to 400 | 1/250s to 1/500s | Polarizer |
These aurora camera settings benchmarks are a starting point. Adjust based on the brightness of the aurora and your specific lens’s performance at high ISO.
Staying safe and shooting smart: Fieldwork strategies
Securing the perfect shot isn’t just technical. Personal safety and smart workflows are equally important on the ground. Iceland’s beauty is real, but so are its risks.
Always check weather and road conditions before heading out. The Icelandic Met Office website and the Safe Travel Iceland app are both free and updated frequently. A road that was passable yesterday can be flooded or iced over by morning.
Safety musts for every shoot day:
- Tell someone your plan: where you’re going, which road, and when you expect to return
- Carry emergency snacks and at least one liter of water per person
- Pack a paper map or download offline maps. Cell coverage disappears in the highlands.
- Wear high-visibility gear or carry a signal mirror in remote areas
- Never turn your back on the ocean at black sand beaches. Sneaker waves are a documented hazard.
Spending hours in each location consistently produces better images than rushing between spots. Here’s how the two approaches compare:
| Factor | Rushed trip | Immersive approach |
|---|---|---|
| Image count | High | Moderate |
| Shot quality | Inconsistent | Consistently stronger |
| Stress level | High | Low to moderate |
| Safety awareness | Often overlooked | Built into the plan |
| Memorable moments | Few | Many |
The client photography journey shows exactly how a well-paced day unfolds in practice. For a broader take on why this approach pays off long-term, the professional travel photography advice resource is worth your time.
Pro Tip: Set a timer on your phone to remind yourself to slow down and just observe for five minutes before touching your camera. The best light often arrives right after you’ve stopped rushing.
What most guides miss about Iceland photography: Why patience and minimalism win
Most Iceland photography guides hand you a list and send you sprinting across the Ring Road. Hit Seljalandsfoss, Skógafoss, Jökulsárlón, the Snæfellsnes Peninsula, all in four days. The images you get from that approach are fine. They look like every other Iceland photo you’ve seen.
The shots that genuinely stop people mid-scroll come from something different. They come from spending three hours at one waterfall, watching the mist shift, waiting for a break in the clouds, noticing how the moss changes color as the light angle drops. You can’t schedule that. You can only show up with minimal gear and maximum attention.
I’ve seen clients arrive with four lenses and leave wishing they’d spent more time with one. The camera bag that weighs twelve kilograms becomes a burden after the second hour on a lava field. Traveling lighter means moving more freely, staying longer, and feeling the place rather than cataloging it.
This is also why photographers choose Iceland over and over. It’s not just the scenery. It’s the way the environment forces you to be present. The checklist gets you there safely and technically ready. But the image that matters comes from what you do after you’ve stopped checking boxes.
Ready for Iceland? Book a local expert photographer
Following this checklist puts you in a strong position to capture Iceland’s most extraordinary moments, from the first aurora shimmer to a waterfall at golden hour. Preparation handles the logistics. What it can’t replace is local knowledge and a practiced eye for where the light will land.

Browse the explore Iceland photo portfolio to see what’s possible when preparation meets experience. Learn more about your local Iceland photographer and the storytelling approach behind every image. When you’re ready to turn your Iceland trip into a visual story you’ll return to for years, book your Iceland photoshoot and let’s build something memorable together.
Frequently asked questions
What are the best months for photographing Iceland’s northern lights?
The best period is from late August to mid-April, when nights are long enough and auroras are most active. Outside this window, the midnight sun makes the sky too bright for aurora visibility.
Why do my camera batteries die so quickly in Iceland’s winter?
Cold weather rapidly drains battery life, so keep extra batteries warm in your inner layers and swap them out before they fully die. Starting a long exposure session with a cold battery is a fast way to miss your shot.
Which camera settings should I use for Iceland’s waterfalls and auroras?
For waterfalls, use f/8 to f/11 with a 1 to 5 second shutter and an ND filter. For auroras, use wide aperture f/2.8, ISO 1600 to 6400, and a shutter speed between 5 and 15 seconds on a tripod.
How do I stay safe when photographing in Iceland’s remote locations?
Always check road conditions before heading out, carry food and water, and share your itinerary with someone before entering the highlands or coastal areas with unpredictable surf.