Master how to capture Iceland's natural light in 2026
Master how to capture Iceland's natural light in 2026 ! Photographer capturing aurora over Iceland mountains Iceland's dramatic light challenges even experienced photographers, from the fleeting golden hours to the unpredictable aurora displays.

Master how to capture Iceland’s natural light in 2026
Iceland’s dramatic light challenges even experienced photographers, from the fleeting golden hours to the unpredictable aurora displays. Most travelers return home with disappointing shots because they rely on automatic settings and poor timing. This guide reveals how to harness Iceland’s unique natural light phenomena through manual camera control, strategic location planning, and safety-conscious preparation, transforming your landscape photography into emotionally compelling visual stories.
Table of Contents
- Prerequisites: What You Need Before Photographing Iceland’s Natural Light
- Understanding Iceland’s Seasonal Light Variations
- Timing and Location Selection for Optimal Light
- Camera and Lens Settings for Iceland’s Unique Light Conditions
- Practical Gear and Safety Considerations
- Common Mistakes and Troubleshooting Light-Related Issues
- Expected Results and Photographic Outcomes
- Bring Your Iceland Photography to Life With Lucy Moments
- Frequently Asked Questions About Capturing Iceland’s Natural Light
Key takeaways
| Point | Details |
|---|---|
| Seasonal light mastery | Iceland’s light varies drastically by season, from 24-hour midnight sun in summer to 4-5 hour winter days requiring different shooting strategies. |
| Manual settings essential | Automatic modes fail in Iceland’s extreme light conditions; manual control of aperture, ISO, and shutter speed ensures sharp, properly exposed images. |
| Gear preparation critical | Sturdy tripods, wide aperture lenses, extra batteries, and weatherproof protection are non-negotiable for successful Iceland photography. |
| Flexible timing wins | Weather changes rapidly in Iceland, so adaptable schedules and location backup plans maximize shooting opportunities. |
| Safety enables creativity | Proper clothing, emergency supplies, and awareness of terrain hazards protect you during extended remote shoots. |
Prerequisites: what you need before photographing Iceland’s natural light
Before you step onto Iceland’s rugged terrain, you need foundational camera knowledge and specific gear. Understanding manual controls is mandatory. You must confidently adjust aperture, shutter speed, and ISO without hesitation because automatic modes consistently fail in Iceland’s challenging light conditions.
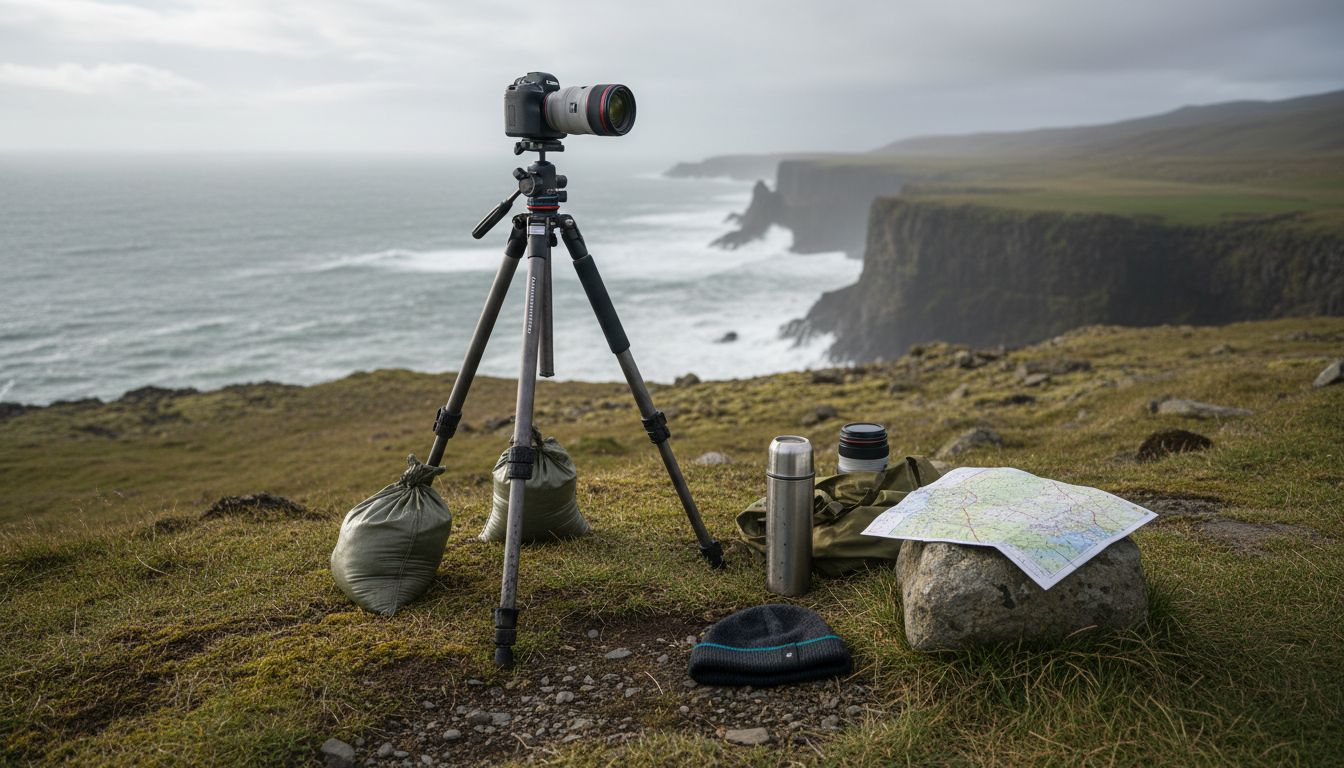
Manual camera controls and sturdy tripods are essential for effective low-light Iceland photography. Your camera must have full manual mode capability, and you’ll need a robust tripod that can withstand Iceland’s notorious winds. Wide aperture lenses (f/2.8 or faster) are critical for capturing enough light during brief golden hours and dark winter days.
Carry multiple spare batteries because Iceland’s cold temperatures drain power rapidly. Pack at least three fully charged batteries and keep them warm in interior jacket pockets when not shooting. Bring extra memory cards since extended shoots and RAW file formats consume storage quickly.
Weather-appropriate clothing makes the difference between abandoning a shoot and capturing that perfect moment. Layer synthetic or wool base layers, insulating mid-layers, and waterproof outer shells. Your hands need protection too, so invest in photography gloves with fingerless flaps.
Understand daylight variations before planning shoots. Summer offers nearly endless light, while winter restricts shooting to narrow windows. Check detailed weather forecasts daily and build flexible schedules that accommodate sudden changes. Safety preparation includes camera rain covers, basic first aid supplies, and communication devices for remote locations.
Pro Tip: Download offline maps and adventure camping safety resources before leaving cellular coverage areas to navigate safely during extended shoots.
Essential gear summary
| Gear Item | Purpose | Priority |
|---|---|---|
| Camera with manual mode | Full control over exposure settings | Critical |
| Sturdy tripod | Stability for long exposures and wind | Critical |
| Wide aperture lens (f/2.8+) | Captures maximum light in dim conditions | Critical |
| Spare batteries (3+) | Prevents power loss in cold weather | High |
| Weatherproof layers | Protection from rain, wind, and cold | High |
| Camera rain cover | Shields gear from moisture damage | Medium |
| Extra memory cards | Storage for extended RAW shooting | Medium |
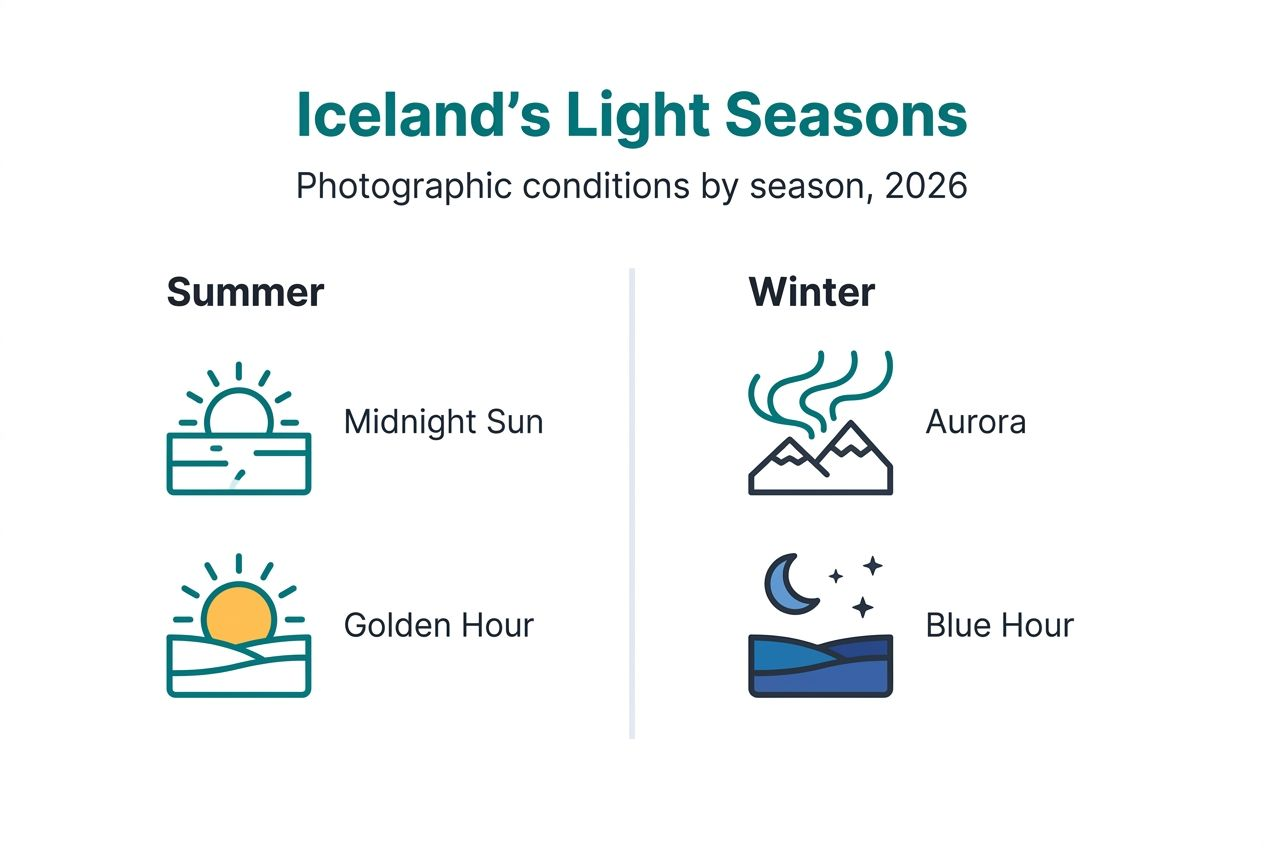
Understanding Iceland’s seasonal light variations
Iceland’s position near the Arctic Circle creates dramatic light variations that directly impact photography opportunities throughout the year. The midnight sun period runs from May 20 through July 22, offering up to 24 hours of usable light for shooting. You can photograph at 2 AM with soft, warm light that normally only appears during brief golden hours elsewhere.
Winter presents the opposite challenge. Daylight in winter averages 4-5 hours daily in December, compressing shooting windows and demanding high ISO capabilities. December days begin around 11 AM and end by 3:30 PM, requiring precise timing and location planning.
Golden hours shift dramatically by season and latitude. Summer golden hours extend for several hours as the sun barely dips below the horizon. Winter golden hours are shorter but more intense, with lower sun angles creating rich, warm tones perfect for mastering Iceland’s natural light in emotional landscape photography.
“Winter’s limited daylight forces photographers to maximize every shooting minute, transforming time management into a critical skill rather than a convenience.”
The aurora borealis appears primarily between September and April when darkness returns. Peak viewing occurs during the equinoxes (March and September) when geomagnetic activity increases. You need completely dark skies, meaning summer’s endless daylight eliminates aurora photography opportunities entirely.
Seasonal light characteristics
- Summer (May to August): Extended twilight periods, soft consistent light, midnight sun enables flexible scheduling, limited true darkness
- Fall (September to November): Returning darkness for aurora shots, balanced daylight hours, increasing weather volatility, dramatic cloud formations
- Winter (December to February): Brief intense golden hours, aurora prime season, extreme cold affecting gear, low sun angles create long shadows
- Spring (March to April): Rapidly lengthening days, transitional light quality, melting snow creates reflective surfaces, unpredictable weather patterns
Timing and location selection for optimal light
Strategic planning separates mediocre shots from stunning images. Golden hour timing varies not just by season but by specific geographic coordinates within Iceland. Southern locations experience different light angles than northern regions, affecting shadow length and color temperature.
Remote areas far from Reykjavik offer essential advantages for aurora photography. Light pollution from cities and towns washes out faint auroras, so choosing Iceland photo locations requires balancing accessibility with darkness quality. The Westfjords and northern Iceland provide exceptional dark skies.
Flexibility is your most valuable planning tool. Iceland’s weather changes within minutes, transforming clear skies into storms and vice versa. Build backup location lists and accept that your carefully planned shoot might need complete redesign based on real-time conditions.
Pro Tip: Use aurora forecast apps like My Aurora Forecast and light pollution maps from lightpollutionmap.info to identify optimal shooting windows and locations 24-48 hours in advance.
Popular locations comparison
| Location | Light Quality | Accessibility | Aurora Potential | Weather Stability |
|---|---|---|---|---|
| Jokulsarlon Glacier Lagoon | Excellent reflections | Easy roadside access | High (dark skies) | Moderate (coastal wind) |
| Kirkjufell Mountain | Dramatic compositions | Easy parking nearby | Medium (some light pollution) | Low (extreme wind exposure) |
| Westfjords Remote Areas | Pristine darkness | Difficult (rough roads) | Very high | Low (isolated, unpredictable) |
| South Coast Waterfalls | Good diffused light | Very easy (main road) | Low (tourist traffic lights) | Moderate (rain frequent) |
Steps to schedule shoots effectively
- Check 7-day weather forecasts focusing on cloud cover percentages and wind speeds
- Identify 3-5 backup locations within reasonable driving distance of your primary target
- Monitor aurora forecasts if shooting between September and April for KP index ratings
- Calculate exact golden hour times for your specific shooting date and GPS coordinates
- Plan arrival 45 minutes before optimal light to scout compositions and test settings
- Build rest periods into schedules to avoid fatigue during multi-day shooting trips
Browse photography locations in Iceland to discover pre-scouted spots with detailed light and access information.
Camera and lens settings for Iceland’s unique light conditions
Manual settings give you complete control over how Iceland’s light renders in your images. Wide aperture lenses (f/2.8 or lower) are mandatory for low-light situations, gathering maximum light during brief golden hours and dark aurora displays. Switch to smaller apertures (f/8 to f/11) during bright midday summer light to maintain sharpness across your frame.
ISO ranges between 800 and 3200 balance brightness and noise effectively during night shoots. Start at ISO 1600 for aurora photography and adjust based on aurora intensity and lens capabilities. Modern cameras handle these ISO levels with acceptable noise, especially when shooting RAW format for post-processing flexibility.
Long shutter speeds capture movement and detail in low light. Aurora photography typically requires 5 to 30-second exposures depending on aurora activity levels. Faster-moving auroras need shorter exposures to maintain definition, while faint auroras benefit from longer captures. Tripods are absolutely required for any exposure longer than 1/60 second.
Disable autofocus and auto ISO for night shooting. Autofocus hunts endlessly in darkness, creating frustration and missed shots. Switch to manual focus, using live view at maximum magnification to focus on bright stars or distant lights. Lock focus and don’t touch it again unless changing compositions significantly.
Pro Tip: Review histograms after each test shot rather than trusting your LCD screen, which appears deceptively bright in dark conditions and can lead to underexposed final images.
Settings by scenario
- Midnight sun landscapes: f/8 to f/11, ISO 100 to 400, shutter 1/125 to 1/500 second, tripod optional for stability
- Golden hour portraits: f/2.8 to f/4, ISO 200 to 800, shutter 1/250 to 1/500 second, natural warm tones
- Aurora borealis: f/2.8 or wider, ISO 1600 to 3200, shutter 5 to 25 seconds, tripod mandatory, manual focus on stars
- Waterfall long exposures: f/11 to f/16, ISO 100, shutter 1 to 4 seconds with ND filter, tripod required, smooth water effect
- Winter twilight: f/4 to f/5.6, ISO 800 to 1600, shutter 1/60 to 1/250 second, balance ambient and subject exposure
Explore detailed Iceland photography gear and settings tips for specific lens recommendations.
Practical gear and safety considerations
Your tripod must withstand Iceland’s relentless wind. Lightweight travel tripods fail when gusts exceed 30 mph, causing camera shake during long exposures. Invest in a sturdy tripod with a hook for hanging your camera bag to add stabilizing weight.
Battery management requires constant attention. Keep at least two spare batteries in interior jacket pockets where body heat maintains charge capacity. Swap batteries every 30 minutes during cold shoots rather than waiting for depletion warnings. Cold batteries often recover functionality when warmed.
Layered, waterproof outdoor clothing protects you during extended shoots in harsh conditions. Hypothermia risk increases rapidly when combining wind, moisture, and cold temperatures. Synthetic or wool materials maintain insulation even when damp, unlike cotton which loses all warming capability when wet.
Camera rain covers and lens cleaning kits prevent moisture damage and maintain image quality. Iceland’s weather shifts from dry to pouring rain within minutes. Keep microfiber cloths accessible to wipe spray from waterfalls and unexpected showers off lens elements immediately.
“Iceland’s weather can transform from calm to dangerous in minutes. Always carry emergency supplies, inform someone of your shooting locations, and prioritize personal safety over any photograph.”
Essential field items
- Heavy-duty tripod with weight hook for wind stability
- Three or more fully charged camera batteries
- Waterproof jacket and pants with sealed seams
- Insulated photography gloves with flip-back fingers
- Camera rain cover or large plastic bag
- Microfiber lens cleaning cloths (multiple)
- Headlamp with red light mode for night shoots
- Emergency bivvy bag and hand warmers
- Offline GPS maps and physical backup maps
- High-energy snacks and insulated water bottle
Review the complete Iceland photo shoot checklist and wild camping safety essentials before remote shooting expeditions.
Common mistakes and troubleshooting light-related issues
Auto ISO and autofocus create the most frustrating failures in Iceland’s challenging light. Auto ISO swings wildly between extreme values, producing inconsistent exposures across your shoot. Autofocus locks onto the wrong elements or refuses to focus entirely in low light, wasting precious shooting time during brief golden hours.
Unprepared photographers rush shoots when weather deteriorates, leading to poor compositions and technical errors. Build flexible schedules with buffer time for weather delays. Accept that some planned shoots won’t happen and maintain backup location lists matching current conditions.
Battery failures sabotage shoots when photographers carry insufficient spares or fail to keep batteries warm. A camera dying during peak aurora activity creates intense disappointment. Carry three batteries minimum and rotate them through warm pockets throughout your shoot.
Exposure errors plague aurora photography especially. Overexposed auroras lose color detail and appear washed out white. Underexposed images hide faint aurora structures and landscape context. Start with conservative settings and adjust incrementally based on histogram feedback.
Pro Tip: Check images immediately after capturing test shots in each new location or lighting condition, adjusting settings before committing to a full series rather than discovering problems during post-processing.
Typical errors with fixes
- Blurry aurora photos: Disable autofocus, use manual focus on bright stars, confirm tripod stability, reduce shutter speed if aurora moves rapidly
- Inconsistent exposures: Lock manual settings for series, avoid auto ISO, use exposure compensation thoughtfully, bracket difficult scenes
- Dead batteries mid-shoot: Carry minimum three spares, rotate batteries through warm pockets, accept reduced battery life in cold
- Washed out golden hour: Reduce ISO to 100-200, use graduated ND filters for bright skies, expose for highlights and lift shadows in post
- Noisy night images: Lower ISO if possible, shoot RAW for better noise reduction, accept some noise as authentic to conditions
Find additional troubleshooting guidance in natural light Icelandic photography tips.
Expected results and photographic outcomes
Successful Iceland photography trips typically require three to five days minimum to capture diverse seasonal lighting conditions. This timeframe allows for weather flexibility and multiple location visits during optimal light windows. Shorter trips risk missing ideal conditions entirely due to Iceland’s weather unpredictability.
Aurora photography with proper manual control and tripod technique achieves 75% or higher success rates for sharp, well-exposed images when auroras appear. The remaining 25% of failures typically result from extreme weather, unexpected cloud cover, or aurora intensity below photographic thresholds.
Golden hour landscape photography produces emotionally rich, warm-toned images during 45 to 60-minute windows before sunset and after sunrise. These brief periods deliver the most compelling light quality, with low sun angles creating dimensional shadows and warm color temperatures enhancing mood.
Performance benchmarks
| Metric | Timeline | Success Rate | Quality Indicator |
|---|---|---|---|
| Sharp aurora capture | 1-3 clear nights | 75-85% with tripod | Stars remain pinpoint sharp |
| Golden hour landscapes | 45-60 min per session | 90%+ in clear weather | Warm tones, long shadows |
| Midnight sun series | 2-4 hour sessions | 95%+ in summer | Consistent soft light |
| Diverse conditions portfolio | 3-5 day trip | 80%+ coverage | Multiple weather/light types |
Photography milestones
- Capture your first sharp aurora image showing color detail and landscape context
- Build a series showing one location through different seasonal light conditions
- Photograph golden hour at three distinct Icelandic landscapes with consistent technical quality
- Create a portfolio demonstrating manual exposure control across varied lighting scenarios
- Document a complete 24-hour midnight sun cycle showing light evolution
Bring your Iceland photography to life with Lucy Moments
You’ve learned the technical foundations for capturing Iceland’s extraordinary natural light, but transforming knowledge into emotionally compelling images takes practice and guidance. Lucy Moments specializes in authentic storytelling through Iceland’s dramatic landscapes, helping adventure travelers and couples create visual narratives that capture both place and personal experience.

Personalized photography sessions combine technical expertise with deep understanding of Iceland’s hidden locations and optimal shooting times. Whether you’re celebrating a milestone, seeking adventure documentation, or simply wanting professional guidance to elevate your photography skills, Lucy offers tailored experiences matching your vision and goals.
Explore additional photography inspiration and practical tips through Lucy’s blog and location guides, or book your Iceland photoshoot to create unforgettable images together.
“I believe every photograph should tell an authentic story, capturing not just Iceland’s breathtaking light but the genuine emotions and connections people experience within these landscapes.”
Frequently asked questions about capturing Iceland’s natural light
What is the best time of year to photograph Iceland’s natural light?
Summer (June to August) offers extended shooting windows with midnight sun and consistent soft light, ideal for beginners. Winter (December to February) provides dramatic aurora opportunities and intense golden hours but requires advanced skills handling extreme cold and limited daylight.
How do I avoid blurry aurora photos?
Use a sturdy tripod, disable autofocus and switch to manual focus on bright stars, and keep shutter speeds between 5 and 20 seconds depending on aurora movement speed. Review detailed lens and settings guidance for specific recommendations.
What camera gear is essential for shooting in Iceland’s cold?
A camera with full manual controls, wide aperture lens (f/2.8 or faster), robust tripod, and minimum three spare batteries are mandatory. Cold weather drains battery power rapidly, and automatic modes fail consistently in Iceland’s extreme light conditions.
Can I capture the midnight sun without special equipment?
Yes, the midnight sun provides abundant light allowing handheld shooting with standard camera settings. However, a tripod still improves composition stability and enables creative long exposures of moving elements like water or clouds during these extended soft-light periods.
How to stay safe while shooting in remote Icelandic locations?
Inform someone of your shooting locations and expected return time, carry offline GPS maps and emergency supplies including bivvy bags, dress in weatherproof layers, and prioritize personal safety over any photograph when conditions deteriorate rapidly.